

GlassPassions' Sandblasted
Fused Art Glass PRocess
Many of my fused art pieces are created with an exciting technique employing a photograph or hand drawn image that, through a series of processes, can be recreated onto the glass. Here is a description, including photos, of how the pieces are made. Almost any image can be used as inspiration, so if you have an image or high resolution photograph that you would like used in a custom piece of your own, contact me for more details. I always welcome doing customized pieces.
Here are the basic steps to the process:
- The line art is generated, either with a high resolution photograph or hand drawn image.
- A film positive of the image is created. If I am using a photograph, I develop the image onto vellum. If I am using a hand drawn image, I copy that image by hand again onto vellum using an oil based pen.
- The film positive is exposed to UV light.
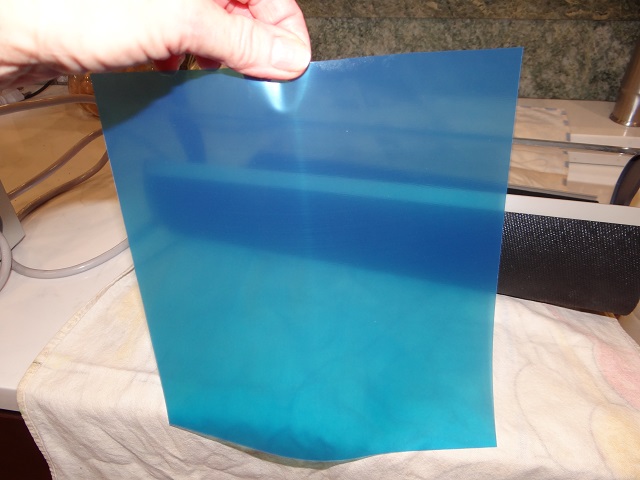
- The film is washed with a hand power washer to remove the unexposed area of the film (my image)This is the area that the sand will be allowed to pass through.
- The film is applied to the glass.
- The glass is blasted. In some cases, this is the final step other than re firing to shape the glass.
- If desired, I fill the blasted area with enamel, allow to dry, clean, and re fire. If shaping of the glass is desired, another firing will be done.
The following is a more detailed explanation of the process, using both a hand drawn image, and a photograph converted into a stamp image.
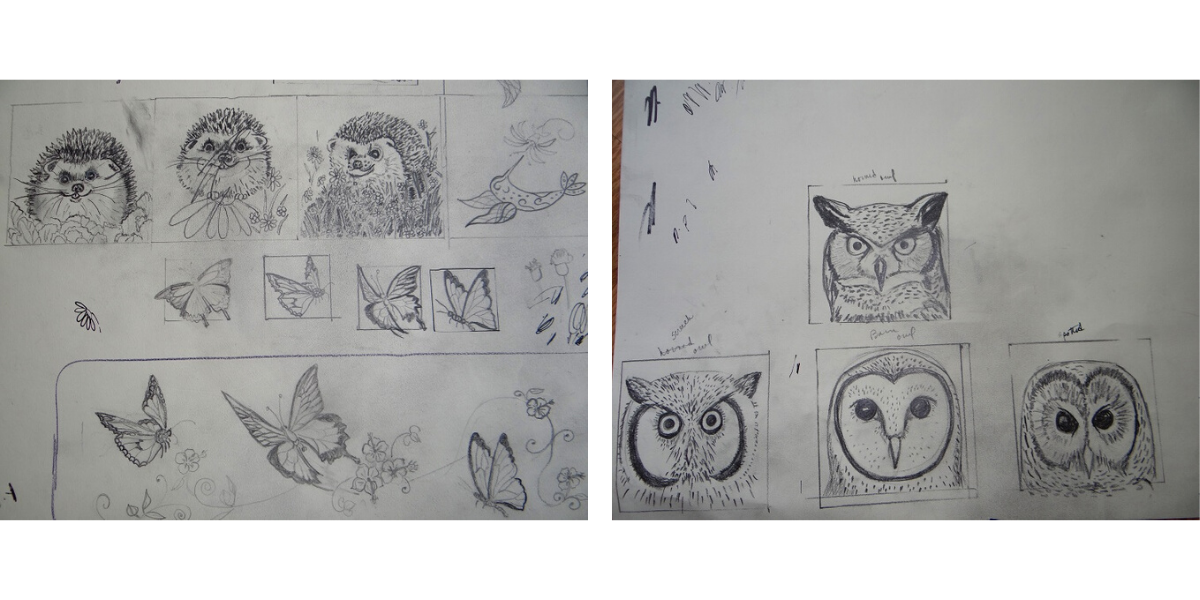
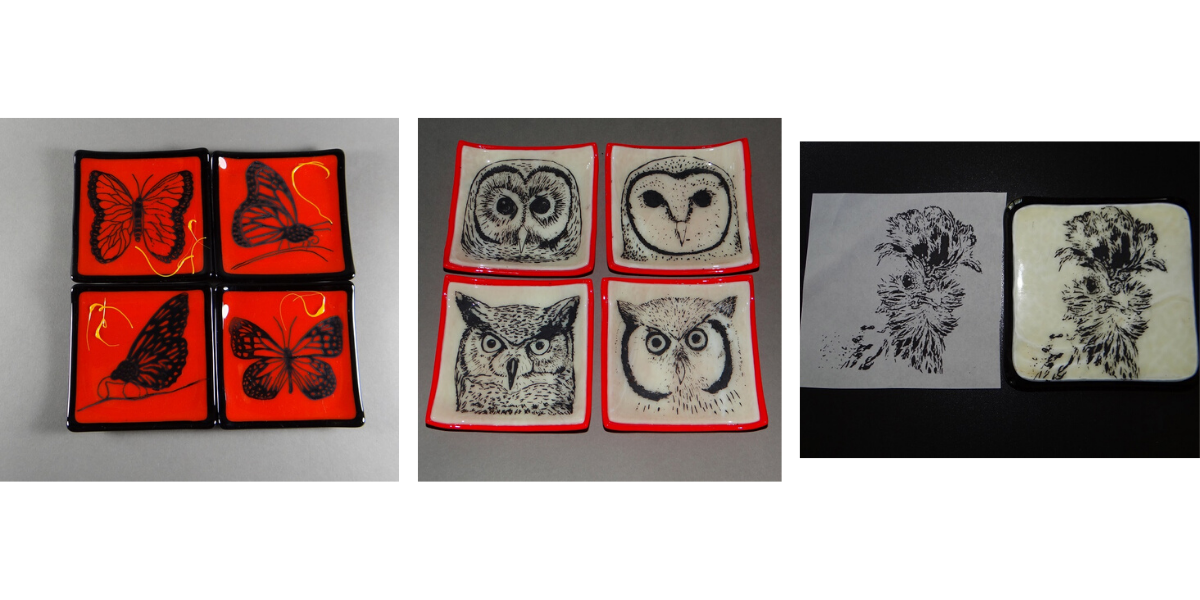
In step 1, I am creating my hand drawn image or using a photograph converted into a stamp image. Below you see an example of my hand drawn sketches of hedgehogs, butterflies, and owls.
 "="">
"="">
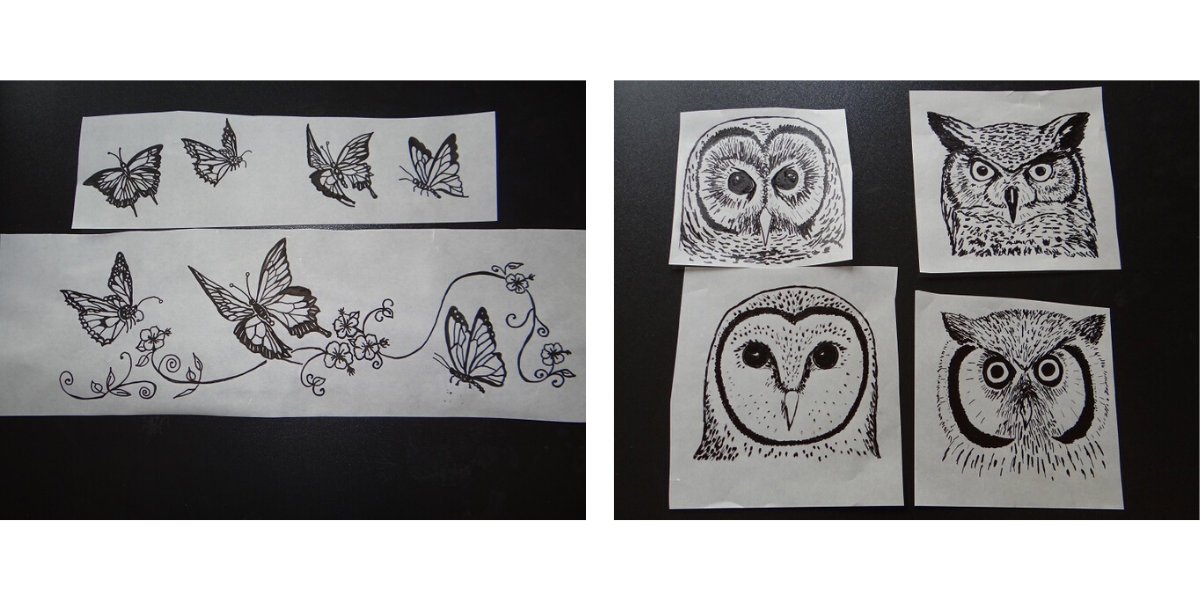
Now for step 2, the images are transferred onto vellum. In the case of the drawings, I re draw or trace the images, using an oil based pen to create a very dark image. For the photograph, a very dense laser image is printed onto the vellum. The vellum is needed so that light can pass through the paper.
 "="">
"="">
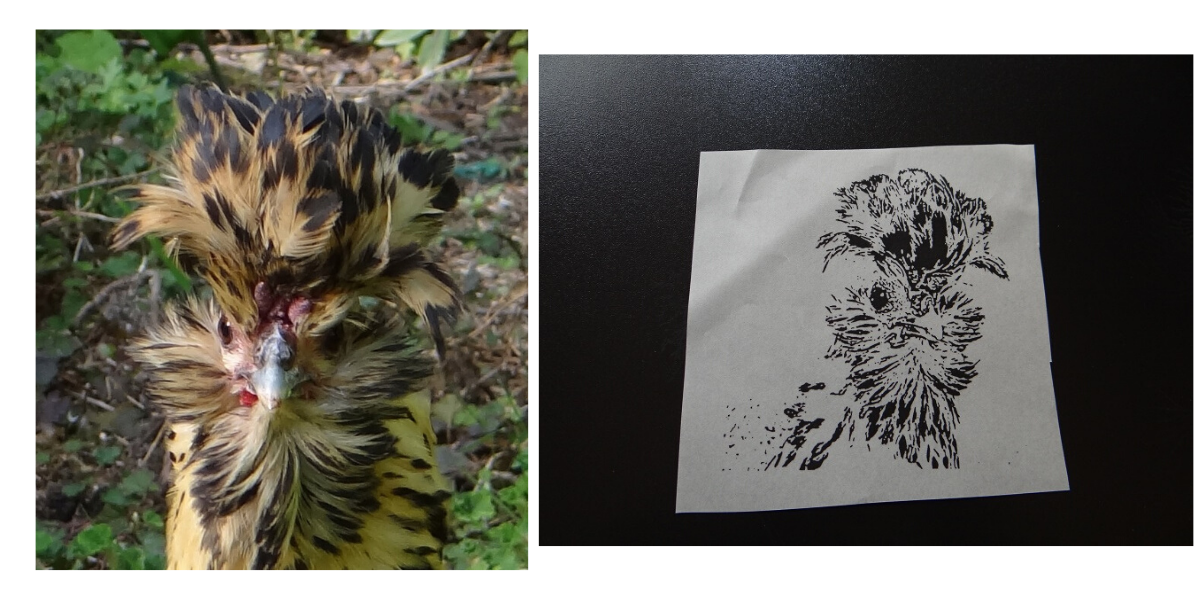
And here, a photograph of my dear little Carmen Miranda, converted to a stamp image. Although the photograph shown here isn’t the original I used for the stamp image, you get the idea…
 "="">
"="">
On to step 3. The images are developed onto the photoresist film (I use Rayzist brand) using a UV exposure unit. When the film is removed, you see no change. That reveal comes with the washout in the next step.
To the left - The UV Exposure Unit.
Below - The Film when removed from the unit.
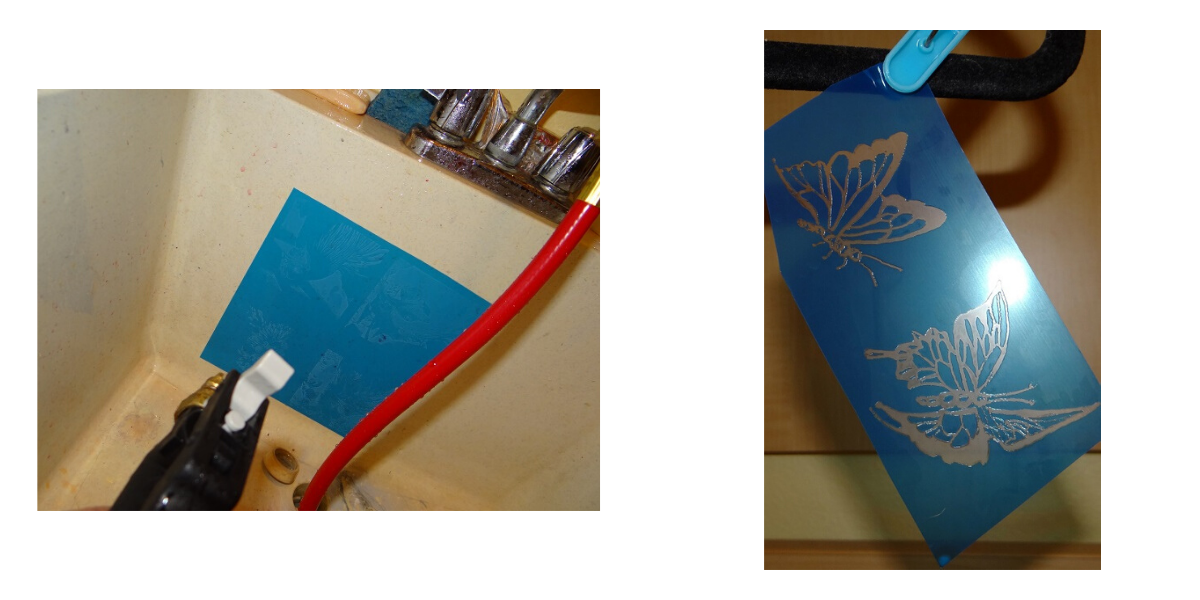
Step 4 is washing out the film with a high powered nozzle. Roll your sleeves up, because you are going to get wet. This takes about a minute, and then the film is hung to dry for up to a couple hours.
 "="">
"="">
In step 5, the film is burnished onto the glass. It is very important that the film be aggressively adhered, otherwise the force of the sandblaster will lift the film off, etching where I don’t want it to, and the piece is ruined. I use electrical tape to mask off any area not covered by the film. The film is extremely expensive, so I use as little as possible to create the images.
 "="">
"="">
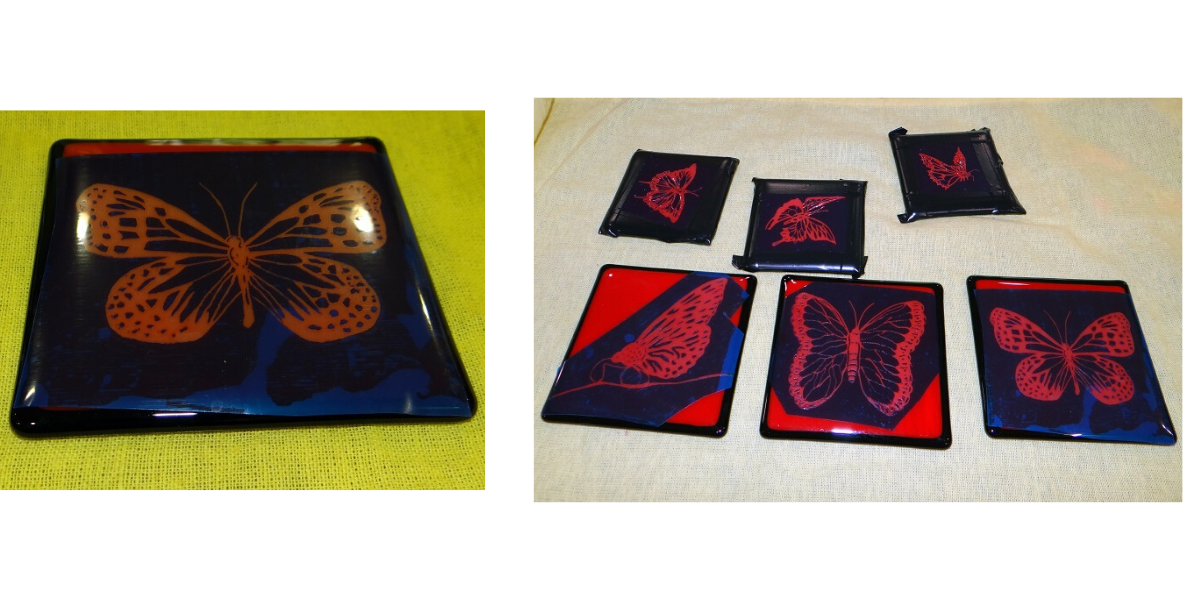
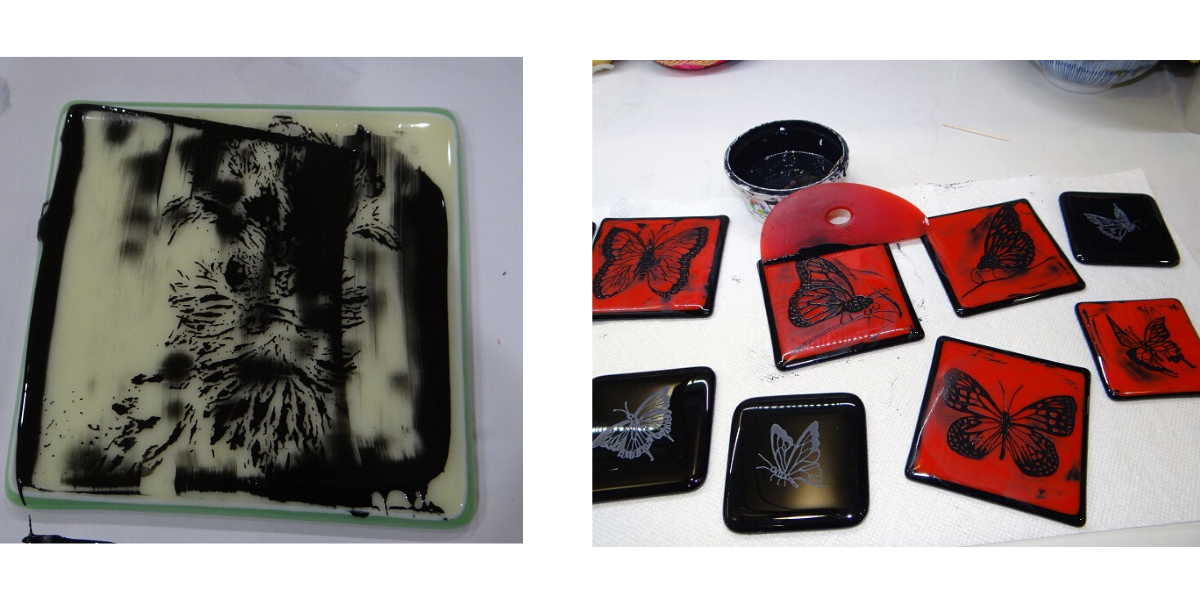
Now that the pieces have been blasted (step 6), I remove the film, and start filling in with enamel if I so choose (step 7). In these photos you can see that the black pieces are blasted, but not yet filled with enamel.
 "="">
"="">
Now the glass is fired once again, to incorporate the enamel into the glass. If I want to “slump” the glass into a curved shape, it will need yet another firing to complete the pieces, as these two processes occur at different temperatures.
 "="">
"="">
